Water-Based Urethane Coating for use on Pigmented/Protected leathers and vinyl
Do not use on Aniline, Wax Pull up, Oil Pull Up or Nubuck leathers
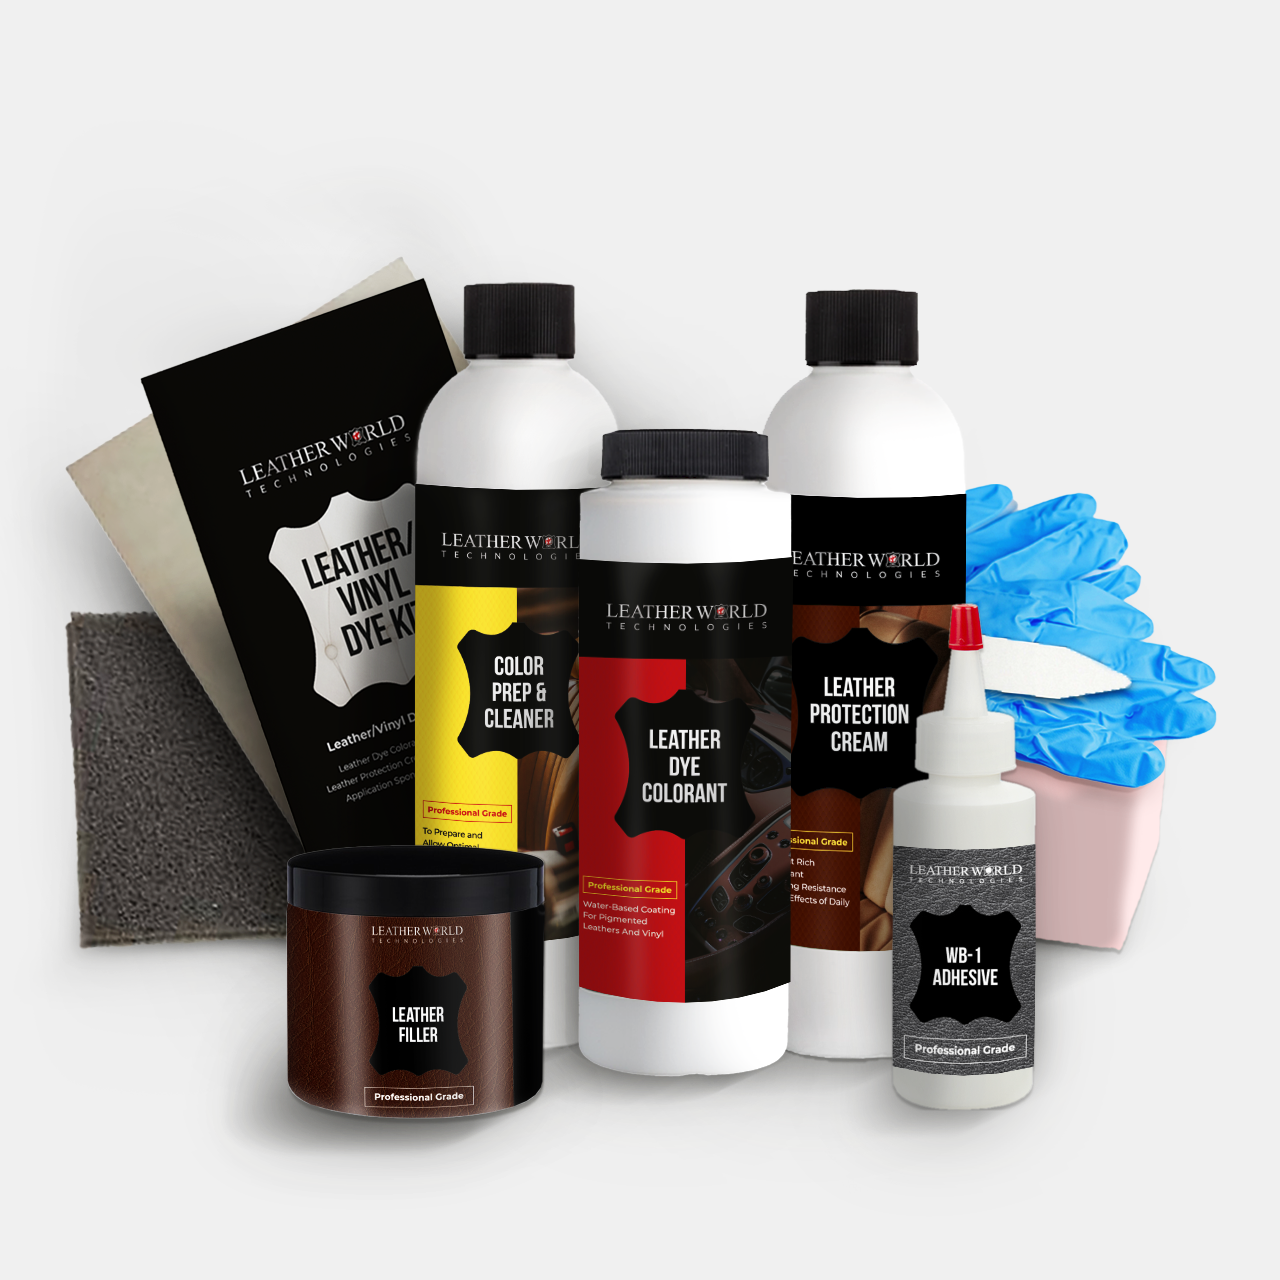
Leather World Technologies Deluxe Leather Repair Kit comes with all the necessary products to make most average size Leather Repairs along with the necessary products to properly prep, recolor and protect your leather or vinyl. It also includes all the necessary application tools and a detailed instruction booklet to make your repair as easy as 123. The professional grade products included in our Deluxe Leather Repair Kit are sure to give you results of a professional Leather Repair to your worn leather or damaged leather and give your leather that "Fresh and New" look again!!
Leather World Technologies Dye Colorant that is included in your kit is a True Water-Based All-In-One professional grade top coating leather dye. This means your adhesion properties; the color and your topcoat are all included in one easy step. If you would like to make your leather even more durable for high use items, we recommend looking at our top-of-the-line Topcoat. This product will help add sheen if needed as it comes in Low, Semi and High gloss and will add an extra clear protective coat for even the heaviest of uses. There is no need to call professional leather repair person when all the products they use are now available to you in one easy to use kit. With over 30 years of Experience in the Leather Repair Industry Leather World Technologies is here to answer any questions you may have and be there for you through the process. Please see our Leather Repair Manual or watch our Leather Repair Videos for additional information about the Leather Repair process.
Below are approximate dye measurements for a color change (use about 1/2 of these amounts for a touch up)
Select one of the six kit sizes available in the drop-down menu above.
| Touch-Up Repair Kit contains: | Standard Repair Kit contains: | Recliner Repair Kit contains: |
|---|---|---|
|
|
|
| Sofa Repair Kit contains: | 3-Piece Repair Kit contains: | 5-Piece Repair Kit contains: |
|
|
|
STEP 1 - Prep & Clean the Area:
Spray the Color Prep & Cleaner to all areas that are going to be re-colored. Using the enclosed Scuff Pad, scuff the leather to prepare it to accept the Dye Colorant. DO NOT scratch the surface with the scuff pad; apply only light pressure to the leather's surface. Wipe clean and allow the leather to dry before moving on to the next step. For repairs, trim off any frayed or excess material. On burn damages, scrape off any charred area before repairing.
*Color Prep & Cleaner will not remove oil based staining. You will need Leather Master Degreaser for any oil or protein based stains.
STEP 2 - Inserting the Sub-Patch (Backing Material):
Trim away any frayed edges on the leather. Cut the sub-patch material about 1/4" bigger than the repair. Insert sub-patch into the leather and secure it with the WB-1 adhesive. Smooth out the surface making sure the leather's surface lies smooth. If padding is missing, add some cotton or foam to make area level. Apply the WB-1 Adhesive working it between the edges of the sub-patch and leather. Press together, let dry for a minimum of 30 minutes. You may use a hair dryer to speed up the drying time. After the patch had dried, fill the area with filler.
*Small holes less than 1/4" may not need the backing material.
STEP 3 - Applying the Filler:
Use the applicator to fill the area between the two pieces of material. It is recommended that you apply several thin coats versus one thick coat. This will give you more strength in your repair and ensure that the filler has properly cured before adding color. Make sure each layer is dry before adding additional filler. You may use a hair dryer to assist in drying. Hold the hair dryer at a 30° angle and at least 12" from repair surface. Make sure the filler is level with both pieces of leather. You may need to lightly sand to get an even surface.
*If you have surface scratches then you will need Leather World Finish Filler. The Finish Filler will build any rough and uneven surfaces up to be sanded and smoothed out. For deeper scratches that are not torn through the leather, Leather World Base Coat has more solids and can be used to build up the leather's finish to even it out.
STEP 4 - Applying the Color:
Test the color first in an inconspicuous area before you start dyeing your repair to make sure the color matches. The Dye Colorant can be applied by spraying or using the enclosed sponge. Make sure all adjoining areas are cleaned around the outer edges of the repair area. Put dye in sprayer or on sponge and apply LIGHT coats to the leather's surface. It will take between 2-4 coats of the leather dye to fully achieve the color of the dye. You will want to allow 4-6 hours of dry time between each coat and 24 hours of dry time after the final coat before use. You may use a hair dryer to speed up dry time. If the area is not completely smooth you can add another coat of Leather Filler or Base Coat before applying the next coat of Dye Colorant. If more Filler or Base Coat is needed, we recommend adding a little bit of color to the product before it's applied.
*Spraying the dye will allow more of an even distribution onto the leathers surface. If you do not have a sprayer we recommend the Crown Spra Tool Kit.
STEP 5 - Applying Protection Cream:
After 24-48 hours apply a light coating of Leather Protection Cream for added durability and protection against general soiling.


 Log in

